|
One of the issues with dealing with an older boat is that the plastics do not hold up well to age. Unlike many boats with wooden masts, Spark has internal halyards. For the non-nautical readers, Halyards are the lines that raise and lower the sails. Most wooden masted sailboats and many with aluminum spars have external Halyards. Where this is important is that the sheaves, the pulleys that the lines run on, are made of a material called "Tuffnol". This English plastic is a form of laminate and is generally resistant to decay in a marine environment. Spark's, however, were old and worn out. The problem is getting new sheaves made of tufnol. The GP class went to an all aluminum rig decades ago and parts for the Series 1 boats have gotten thin on the ground. The fact that very few GP14s made it to the US makes getting parts harder. This means I had to build my own. The pulleys are by Harken, a well respected name in sailing. The Sheaves I build of an African hardwood called "Burbinga". This is a very pretty and very hard wood. I burned out several blades on the scroll saw shaping this wood. They should last a good long time and the darker wood contrasts nicely with the blonde spruce of the mast. Due to the fact I had to make them myself, they are slightly larger than the originals, this required me cutting the holes in the mast to fit. I am not totally happy with my handiwork in that regard, but it can be fixed later. That is for a later post.
0 Comments
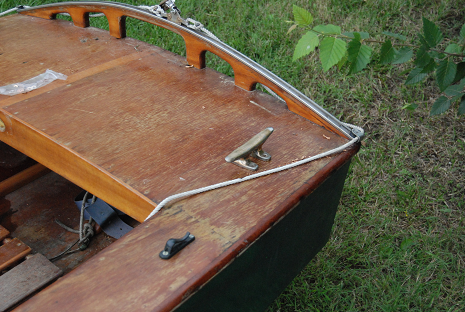
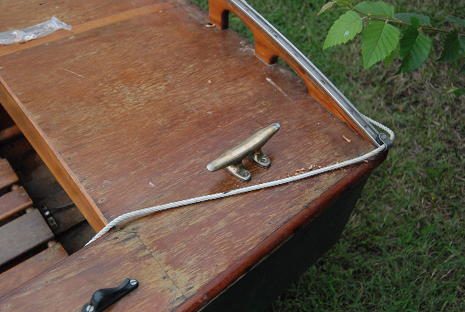
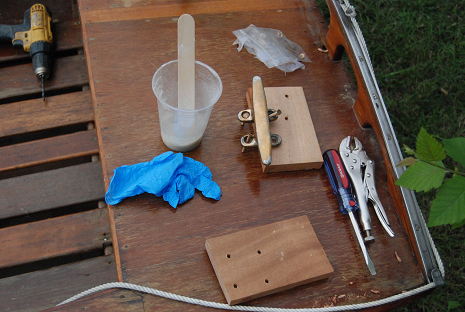
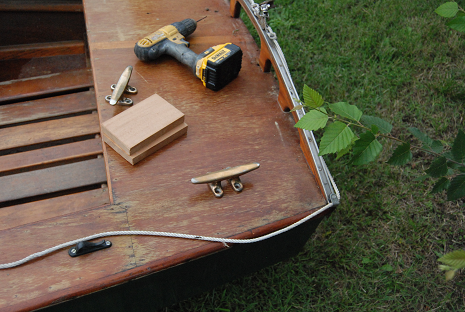
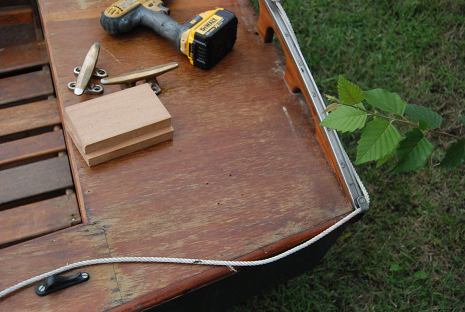
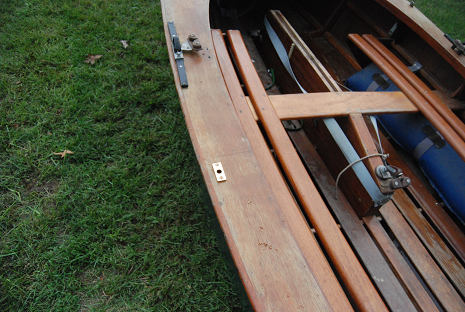
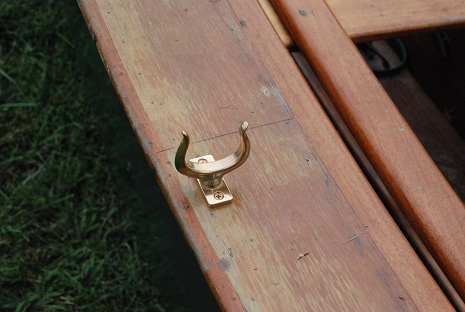
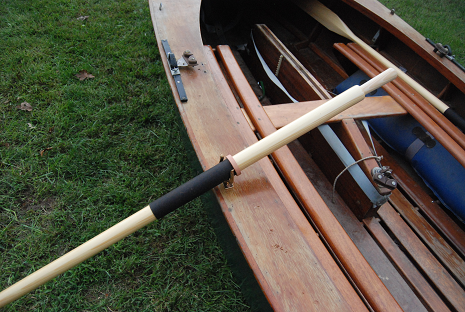
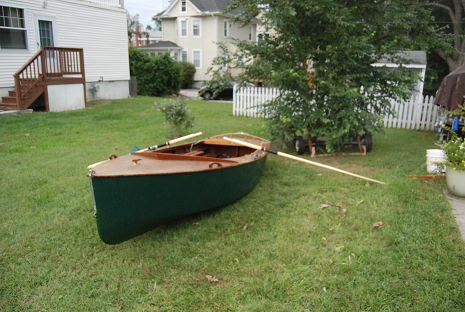
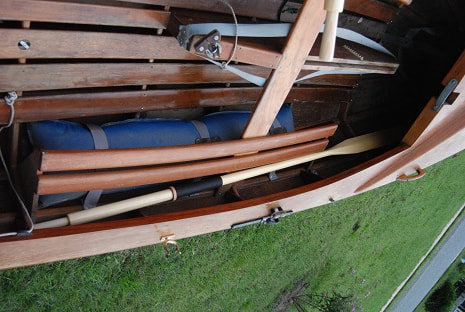
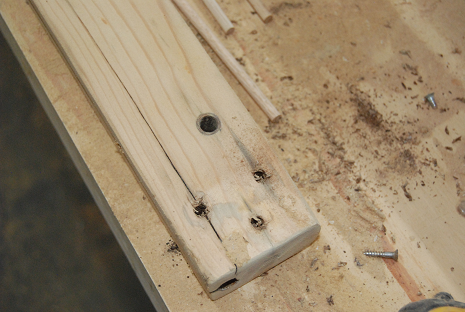
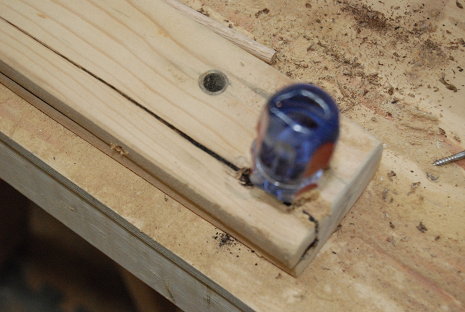
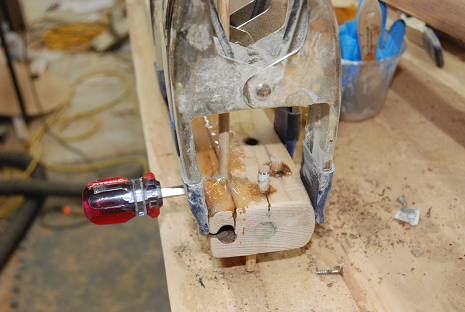
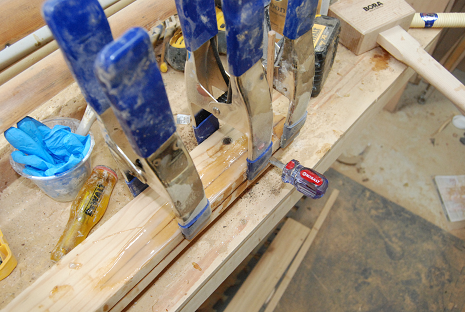
Most of Spark's time on the water was spent as a race boat. Stone Harbor and Ocean City NJ both kept good sized fleets of GP14s just for racing. GP, of course, stands for "General Purpose" and as such, Spark and her sisters were designed for more than just setting records over a course. Many in the UK and Down in Australia and New Zealand have been used for cruising and "beach camping" along those far off shores. As Spark was a race boat, she us sorely lacking in the essentials to become a competent Beach Camper. For one, she has almost no way to tie her up or anchor her off. The one and only cleat she had was comically undersized as to be almost toy-like. I needed to make some changes. Starting with the cleats: The bow cleat needed to go and be replaced with something more robust for both tying off to a dock and mooring out on an anchor. As you can tell, the original would never do. 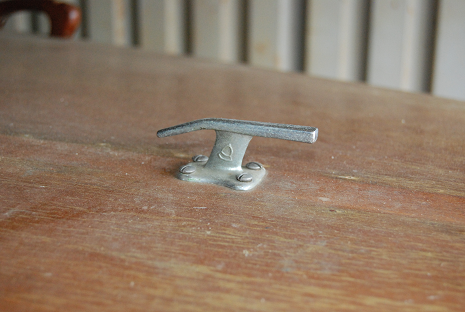 To give you a hint how small and dainty this bit of aluminum is, here it sits next to it's bronze replacement. 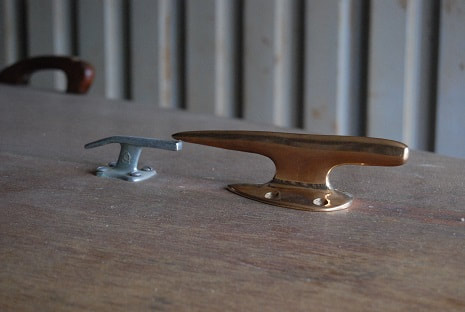 It's more robust and stylish to boot. I believe it came off of a Chris Craft of some sort. It definitely fits in with the era that Spark came from. Here it is finally attached to the foredeck like it should be, with 4 bronze machine screws and nuts to keep it well secured to the beams below. Moving aft, Spark had no cleats at all on her stern. The only choice would be to tie off using the horse that holds the traveler over the rudder/tiller. I really did not want to rip that off with a good wave or wind while out and about.. so I set about adding more cleats. With only a thin, 6mm, mahogany plywood deck, I had to add a block of mahogany to the underside to keep it from being pulled right off the first time it was used. I also needed to keep it clear of the control lines from the traveler and free of the Tiller's movements across the lazerette deck. Once all was put into place. I epoxied the blocks right and left and bolted through them to snug everything up tight and secure. If these cleats come loose, I am losing a sizable chunk of deck too. Now, While the General Purpose in GP14 denotes being able to do everything, I needed a way to get moving when the wind was nigh or coming from the wrong direction. I was not about to hang even an electric trolling motor on Spark, so I set about putting some oars into place. Thankfully Bell Woodworking thoughtfully built a matched pair of Mahogany blocks beneath Spark's deck right where the oarlocks would mount. You might think they had thought of this exact scenario. With the blocks already in place, all I needed to do was drill some holes and bolt the mounts into place. Chesapeake Light Craft was kind enough to sell me these mounts and locks, the polished bronze looks lovely and shipshape. It goes without saying that oarlocks are useless without oars. Shaw and Tenney supplied these custom length oars just for me. Straight Bladed and beautifully varnished, they look better than almost all the wood currently on Spark. They also store nicely out of the way, blades towards the bow, behind the seating surfaces of the side benches. Tomorrow, if all goes well, I will give her the Float test at Lake Lenape in Mays Landing. After being out of the water for close to 40 years, I want to make sure she has no leaks to keep me up at night.
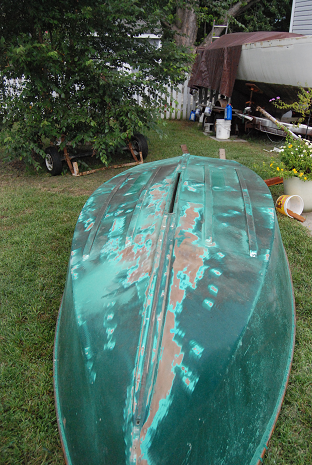
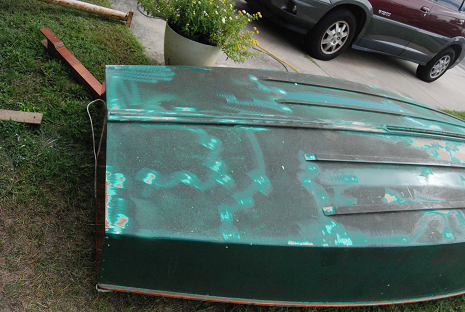
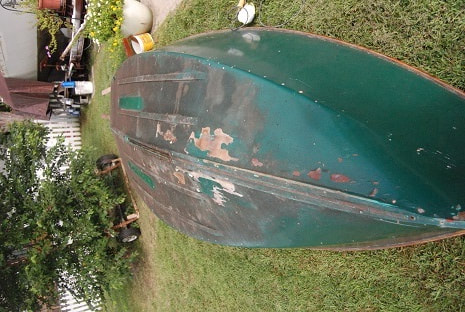
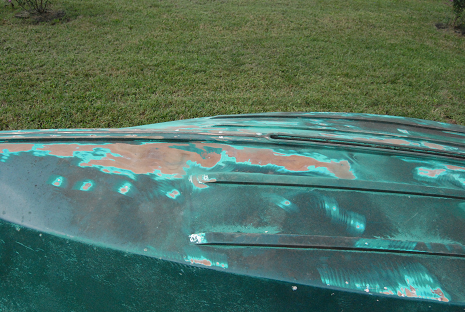
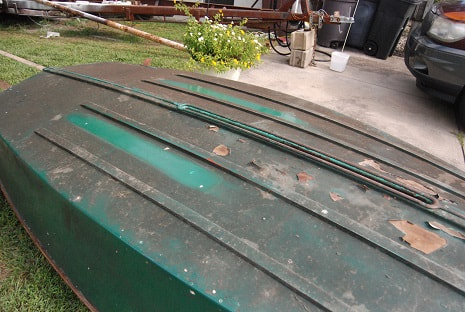
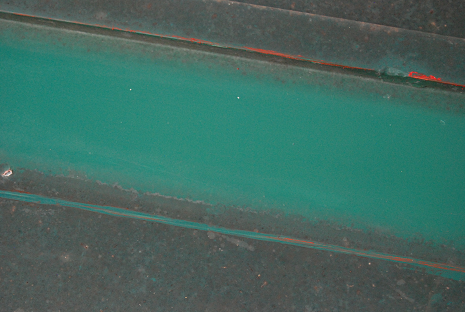
1981 was the last year that Spark was legally allowed to sail, according to the Pa DCNR (Department of Conservation and Natural Resources) sticker on the side of her hull that was needed to sail on any of Pennsylvania's numerous lakes. It seemed at that time, she was put back on her trailer and put away quite wet to judge by the dried out slime that was still tenuously stuck to her bottom. In those 37 years her paint has suffered. Not only from the occasional scratch, but from blistering and pealing. I am willing to bet the green was original to spark when she was built in the early 60s. Finally getting her home I was faced with this mess: Of course soon after I sanded off the worst of the loose stuff, it rained for two days. Thanks to George Kirby ( https://kirbypaint.com/ ) I was able to get some nice oil based paint that was similar in hue for a quick and dirty repaint of Spark's bottom and a touch up on her sides. I will be the first to admit that it is not pretty, but right now it is all about protecting the wood. I can make it pretty later. In car terms -Spark is no a "ten footer" as in she looks ok from ten feet away. Anybody standing on shore will see a pretty little sailboat, that is all that matters right now. Proper paint and varnish can some this spring
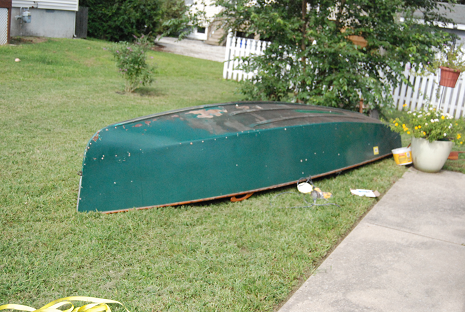
After finally getting the parts of my trailer back from the welder (three months!) I have Spark home and sitting on the grass as I take care of some flaky paint and a few other issues before I can drop her in the drink. Tomorrow she gets some paint slapped over that bare spots. Nothing pretty this year, I want to bring her down to St, Michaels in a week "as is"
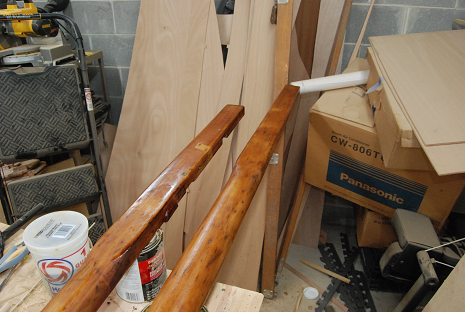
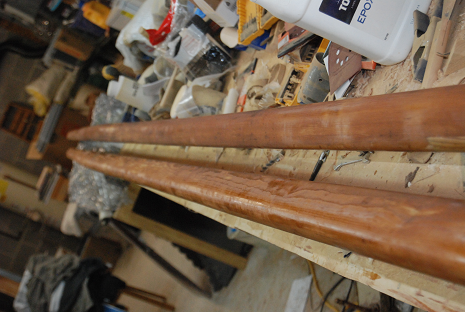
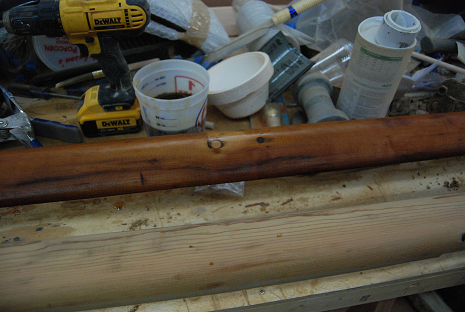
After looking hard at the first coat of varnish I put on the still split mast, I decided I hated it. Too mottled with small dark areas from the hand sanding not removing all the old varnish and stains. Once I glued the mast back together, I also needed to get my fingerprints off of the wood before revarnishing. So, out came the "mouse" and away went all the dark spots and bit of epoxy that escaped the clamped wood. Nice and clean and ready for a new coating of clean shiny varnish. Unfortunately I needed to buy a new can of the stuff. The old can had turned into a jello like consistency. To hold the mast up off of the table for varnishing, I stuck several pieces of 4mm scrap okoume ply into the sail bolt slot and used a pair of clamps to act as feet. this puts the mast up off of the table and sits it high enough that I can see beneath it to add varnish to the "bottom". A week's worth of varnishing is infront of me, but it should be worth the effort!
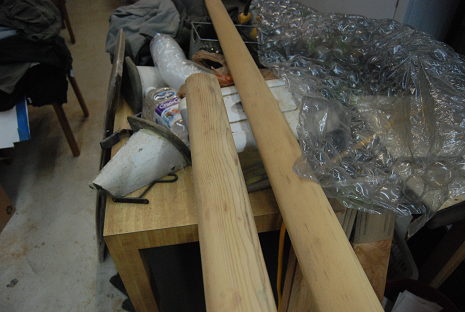
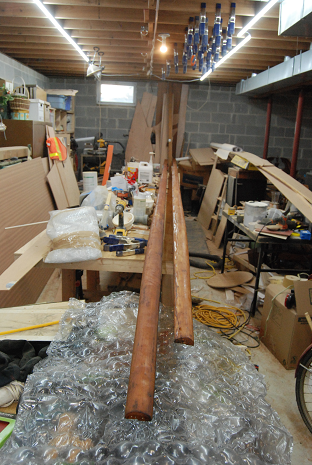
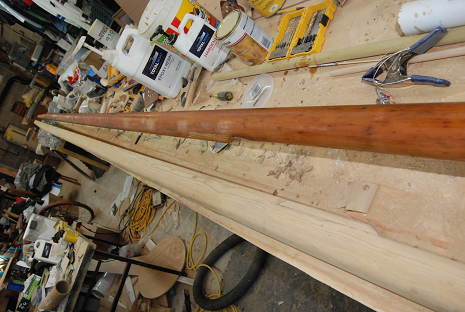
One of those phrases you will never hear somebody working on boats or with wood say: "I have enough clamps". Today I can say that. After cleaning up the mess inside the mast and adding a layer of varnish for protection, I glued Spark's mast back together, all twenty two and a half feet of it. With epoxy slightly thickened to just below the consistency of apple sauce to keep it from running all over the place, and to add to it's adhesive properties, I spread it liberally on both sides of the split and then clamped it all together. It took every spring clamp I own, all 58 of them, to accomplish this task with a four to six inch spacing between them. Hopefully this time tomorrow, I can sand off any drips that escaped and begin varnishing anew! I think I need to get more clamps!
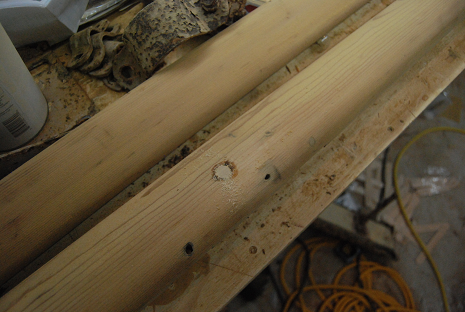
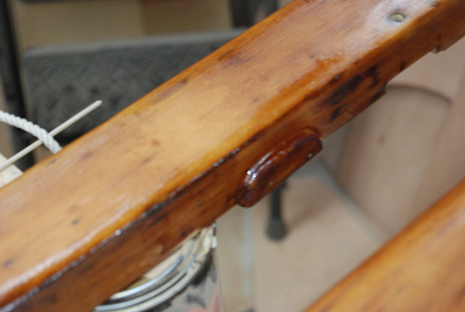
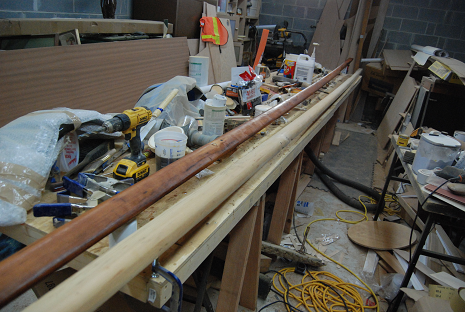
Whomever first came up with this phrase must have been working on a boat. Last night I sanded the boom down to fresh wood. This task was actually harder than doing the mast as the boom is a square section as opposed to the mast's oval. This meant 4 sides plus the ends all needed to be brought down to bare wood in anticipation of fresh varnish. Thankfully I decided to fill all the screw holes and re-drill them later. The wood was darkened around them where water had used the holes to get in around the varnish and start a little rot. After purchasing a 1/4" (4mm) dowel, I proceeded to drill out each screw hole to the same size. In doing so some blacked wood shavings came out and at the trailing edge of the boom, the carved in sail track split. Hence the use of the term "It's always something." But, it could be worse, I might have discovered this little issue on my first sail instead of during preparation for varnish. While not life threatening, It would have quickly brought an end to my sailing for the day and possibly the week until I got it properly repaired. First: Dowels. And of course, the split and the repairs. Thank goodness that as a boat builder and restorer, I follow the rule that "you can never have enough clamps". I only needed three, but they were right there for the use after I applied some thickened epoxy. Tomorrow I sand again and can hopefully start varnishing! In the heyday of sailing ships, Britain's famous "wooden walls" and the fledgling United States Navy, being "before the mast" meant you were an ordinary seaman, with your quarters in the Forecastle, or ahead of the mainmast. Officers lived towards the stern where there was more room and a more gentle motion than the bow's constant breaking through waves and wind. In Spark's case, I meant it as the mast is finally being worked on. I have most of her repairs done. Holes have been glued shut with dowels, the split at the top of the sail track has been repaired, and I now have the first coat of varnish on. I still need to glue both halves back together, but I wanted to get a few layers of protective varnish on the wood before I got to that point. Next week, I hope. Being the first layer of varnish, do not expect much. The wood is dry and "thirsty" and simply soaked it in. It will not be till I get about three or four layers on that the magic will start to happen. First the repairs: The plugs are where somebody thru bolted the hounds on, and the top of the last had a split in the carved in sail track. I needed to epoxy that back together before I could sand and varnish. I hope it holds or I will have to 'glass it and paint the top of the mast white to hide the repair. And now the varnish: You can see the colour difference between freshly sanded and varnished. I would love to know what wood was used in building this mast. I am thinking some variation on Fir or Spruce due to it's lightness. but I do not know enough about wood to be certain.
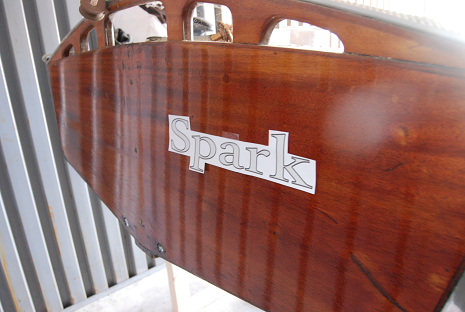
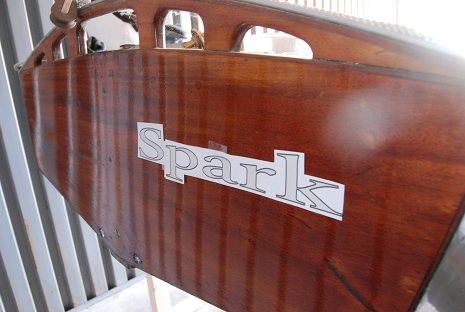
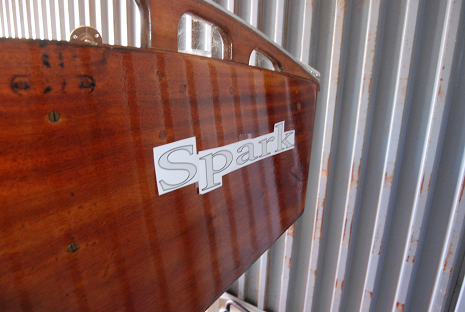
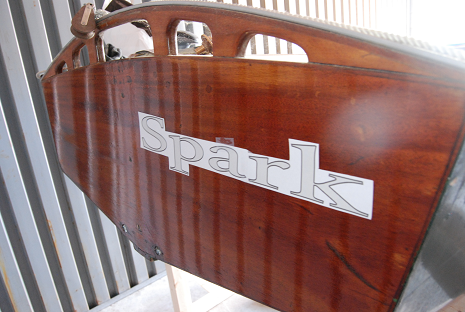
To the superstitious sailor -everything. Poseidon, Greek god of the seas, does not take kindly to boats and ships without names or those that have been renamed without ceremony. Even disregarding the ancient Greeks and the Romans that usurped their lands and gods, every boat needs a name, even if just for safety's sake. To make a call to the United States Coast Guard from "art's boat" simply does not take the same consideration as a call from the "Sailing Vessel Spark". With that in mind, Spark's transom is coming along nicely with the mahogany taking on a nice reddish glow below 5 layers of varnish. You can still see the marks and scars, but it is still a pretty stern. Having gotten to the point, consideration was made to affixing her proper name to that lovely wood. In this regard, computers and printers make it so much easier than before! After choosing a font, one that was neither too serious nor too frivolous, it was time to choose a size. I printed up three different variations and casually taped them to the transom to see how they look. Remember that Spark has an outboard rudder that bisects the stern, so the name has to be both offset and small enough to fit half the size yet still be large enough to be read. Starting with the small. 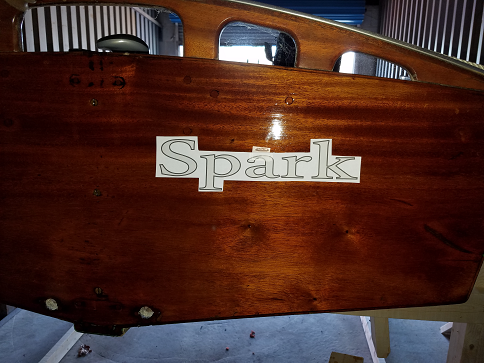 It is just a little too small. It does not fit the space properly and would leave too much to be desired in reading from a distance. Next: Medium. 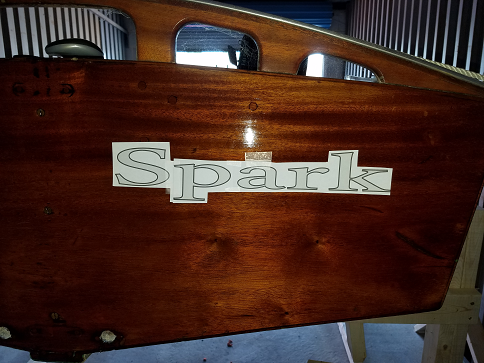 Medium is the one I think I prefer, now I am not too sure. It leaves just the perfect bit of blank space between the side of the transom and the rudder and is easier to read from a distance without overpowering the stern. And now for Large: 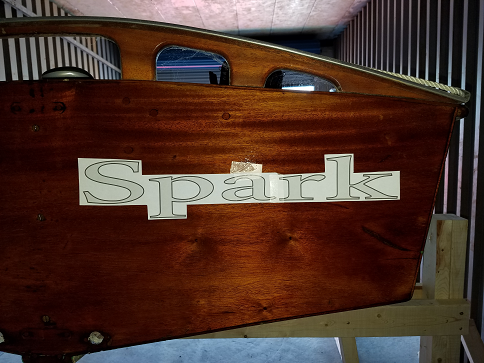 Much easier to read and still gives a nice bit of wood showing between the letters and the defined edges of the space. I am caught between the Medium and the Large. Originally I preferred the medium while I was working on Spark, but in the pictures I think the Large looks better. I need to think about this for a set before I finally decide. Still, is progress!
It's funny, I approached varnish with a lot of trepidation. I imagine part of it was unfamiliarity, but a lot was expectation. Being around boats quite a bit, I have seen some truly varnished pieces of work, and I had this feeling I could never live up to that sort of goal. Today, I cannot claim to be an expert in varnish, but I can admit to enjoying the process. Spark's transom, being solid mahogany, is a wonderful place to play with varnish. The warm reddish hues really jump out in the light with a slick coating of varnish over the wood. Thus far I am on my third coat, lightly sanded between. Already the finished product is teasing me. If it looks this good now, what will it look like under another five coats? Obviously the first coat barely came up at all, the mahogany drew most of it deep into it's pores, cracks, and crevices, the Second looked better, and now the third, is turning out wonderfully. I just wish she was not stern in so I could back up further to get a better view. 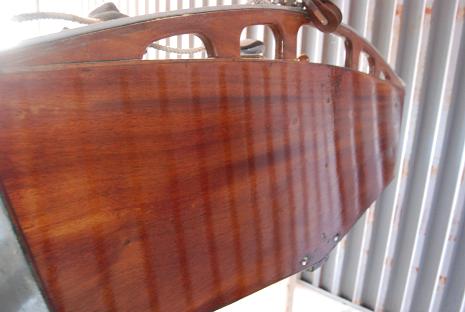 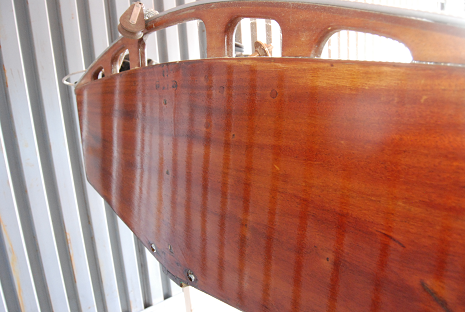 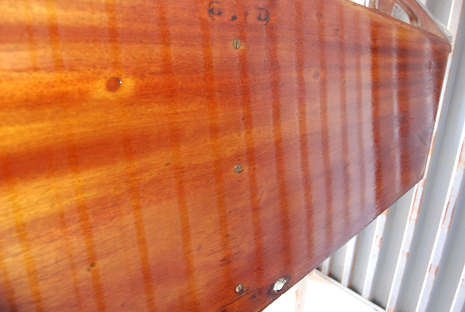 There is an unfortunate side effect to all this... I really want to sand down and varnish Spark's deck. I promised myself I would not touch it or her topsides till after St. Michaels in October, but the urge gnaws at me as it grows
|