|
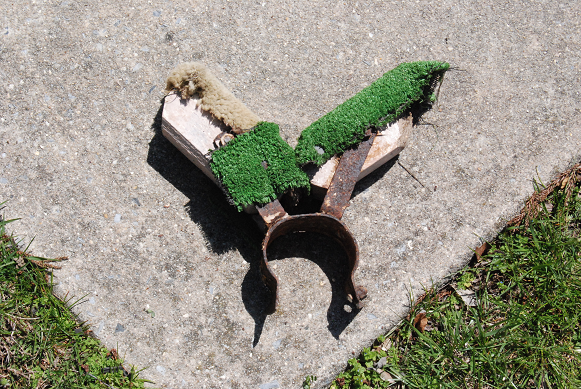
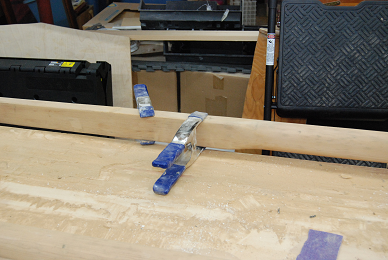
There is one truism about owning a wooden boat, You will never be done sanding (and varnishing). While wood is a very versatile and strong medium to build a boat, it does require more maintenance than one made of "frozen snot", metal, or even ferrocement. Anything that grows can wither and rot, all we can do is postpone the inevitable. Yesterday I worked on Spark's Tiller. While in good shape for something made 64+ years ago, it was showing it's age and what was left of the varnish was neither protecting nor showing it off to best advantage. It also needed work in regards to the extension and other parts. Being a Dinghy without any sort of ballast, Spark relies on three things to keep her upright. One is the form of her hull, two is "live" ballast, and the third is the intelligence and wisdom of her captain. Usually two and three are the same thing. In order for the captain to function as ballast, he needs to be able to move about the boat, he can't do that if shackled to the tiller. This is where an extension comes in. This small piece of wood (or metal, or carbon) bolts or screws to the near end of the tiller and allows whomever is manning it to move that much further away without compromising their ability to control the boat. The tiller also has a secondary function, it controls a rope that holds the rudder blade in the down position. In Spark's case, this is a bungee cord that allows the blade to kick up if it hits something, but then immediately get pulled back down. This control line runs up the rudder and along the bottom of the tiller to a guide tube and a cleat. Both of these were made of plastic and quite brittle, so into the bin they went. I already replaced them with a tasty bit of bronze kit. The Bronze Tube Jam Cleat is exactly what it's name sounds like. The rope (or Bungee in this case) passes through the tube and is allowed to run free unless pulled to the Right and into the "v". At this point the rope is wedged tightly and cannot be moved unless pulled further through and straight, at which point it will run free again 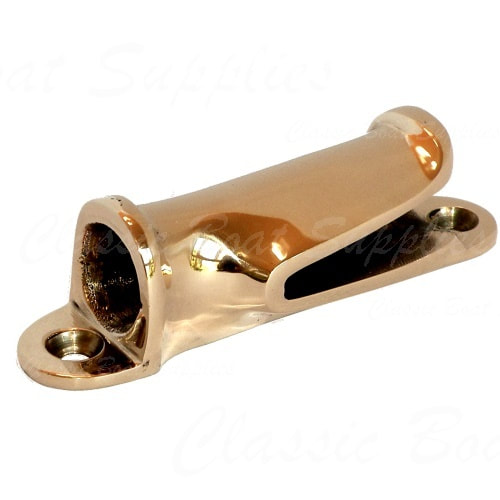 It's going to take a little while to get here, it's being shipped from down under.
1 Comment
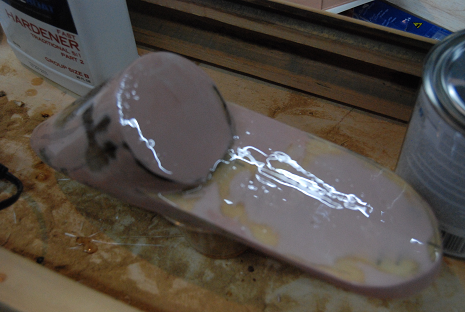
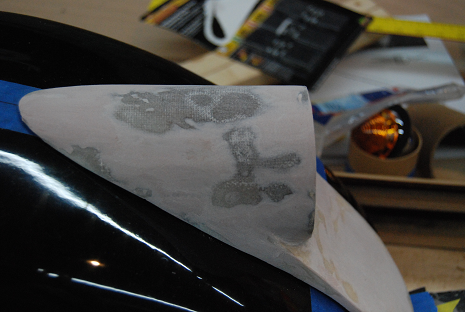
Not with building the trailer, but with the taillight plinths. Well, one of them anyway. Done with the bondo even though it still needs a little bit of minor filling and sanding. That is what they make glazing putty for. As of now, I am just putting a couple layers of straight epoxy on it for strength before applying putty and the final bits of sanding before paint.
Then I get to do it again. Honestly, I surprised myself with this. A few days ago it was a cardboard shipping tube and a couple of pieces of balsa wood. It came out much better (and easier) than I ever expected. I can't wait to see it finished! After all the work of building two different taillight plinths for my trailer, I am now on the third iteration. This one looks a lot more like the MGA taillight mounts I actually bought for the trailer but discovered I could not make them work. The new one is simpler to build, easier to look at, and a much better design. I still have a metric tonne of sanding, filling, sanding some more, maybe some more filling, and then more sanding before I can paint. Then I need to build the other side.
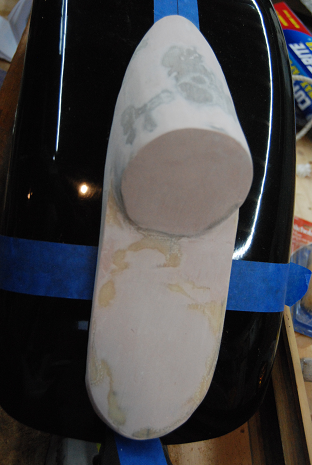
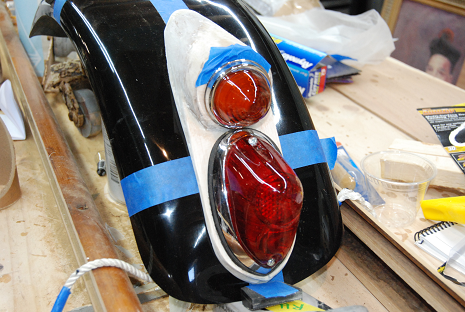
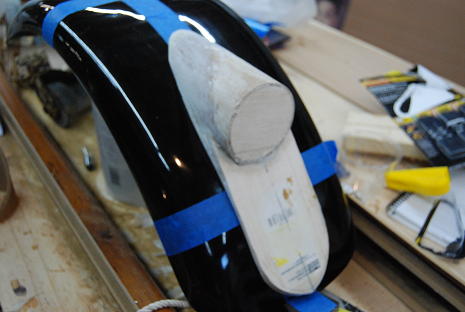
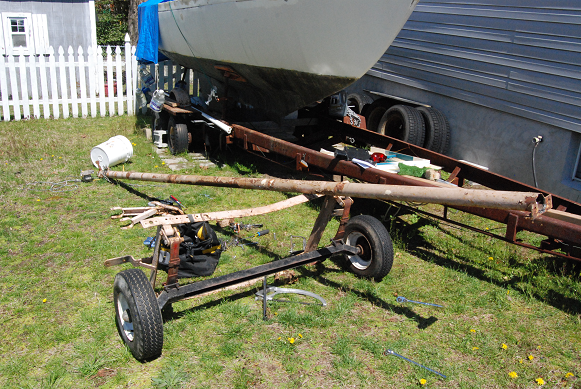
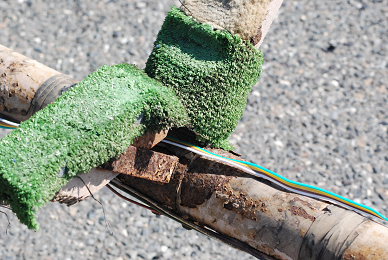
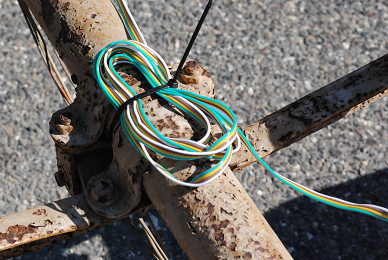
With the lighting you have seen me teasing at, here is the final piece to pull it all together (aside from the welding that needs doing) the rims and tyres. As originally built, the Moody Trailer Spark uses sits on small Eight inch diameter rims. I imagine I could have used original Mini rims at ten inches, but I feel that a larger rolling diametre leads to less bearing wear. So I give you Thirteen inch diametre Panasports for the MG Midget with some beefy 185/70/13 tyres. 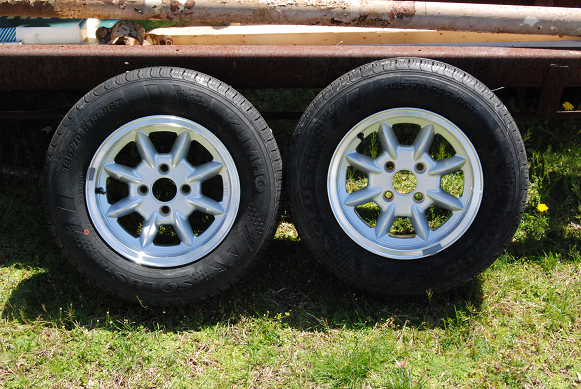 There may be a small difference in size between the original and the new. 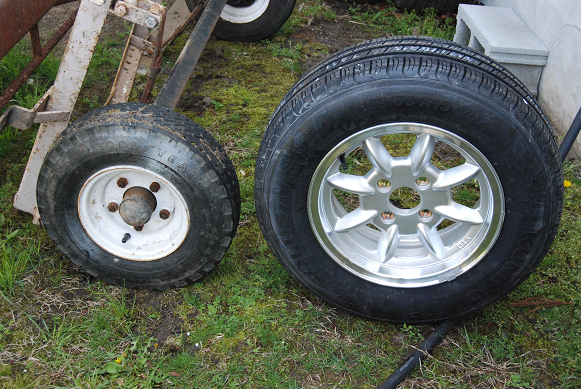 With my hectic work schedule recently, work has slowed to a crawl, but I did get more done today. As of now, Spark's trailer is completely apart and ready to be sent off for welding, strengthening, and extending. The rear box section, where the axle hooks onto, will be scrapped. At 54 year old, I do not trust the springs or axle itself. The new section will be built of C-Channel with an Axle-less suspension to clean things up, add ground clearance, and make repairs easier. The central spine will be lengthened two feet, and flanged where it bolts to the box instead of clamped. Now for the grisly stuff: At the very rear of the trailer, where it sits beneath Spark's transom, will be the license plate, a third brakelight/reflector, reversing light, and a rear fog. Yes, I am wiring this trailer up for 7 pin to better fit my Land Rover Discovery's trailer wiring setup. I do not have the reversing or rear fog lights yet, but I do have the rear brake, It is a reproduction piece for a vintage English Motorcycle. I think it will be quite stylish! 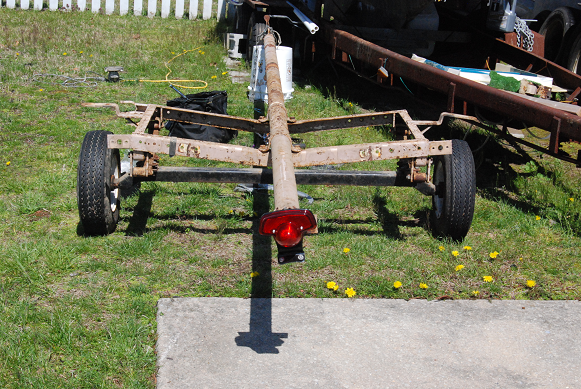 To mount a flat object to a curved surface, you need to build a mount to bridge the gaps between the two. I also wanted to make it look nice, neat, and factory, so making a slightly flared mount or "plinth" is a must. I started off with some balsa, cutting it slightly larger than the rubber gasket. 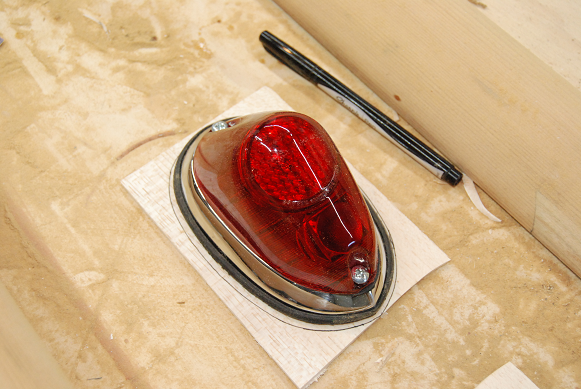 The next layer is slightly larger still and the two after that are even larger, but only quarter size. I did that to lessen the amount of sanding and shaping I would have to do later. I may need to add a 5th layer to help the top and bottom, but I won't know until I trial fit them. 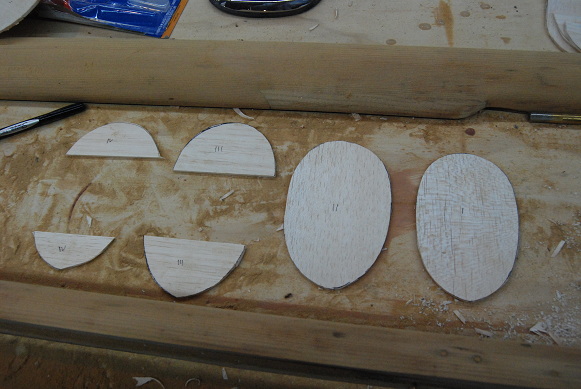 A little epoxy and I have some very rough mounts. I will still need to add more epoxy, filler, and glassfibre before I sand them all smooth. 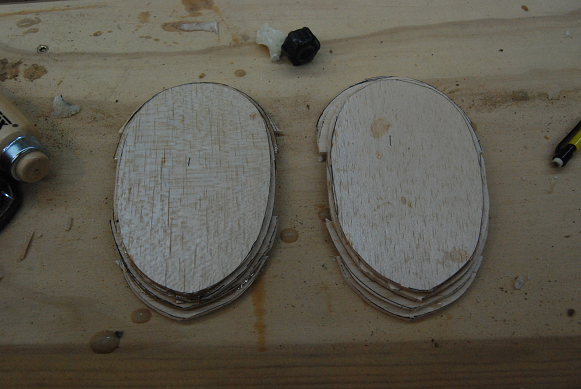 While I still had the epoxy in a cup, I decided to roughly do the round mounts for the turn signals. These are round amber "beehive" style lights from the MGA and Bugeye Sprite, so they need round mounts. Thankfully, I had a cardboard tube laying about that was the perfect size. 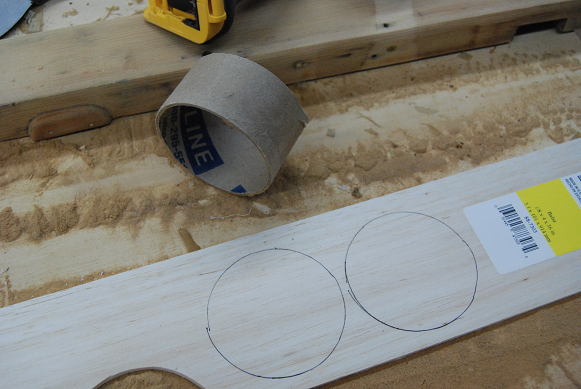 A little cutting, some balsa circles, and epoxy later, I have capped tubes. 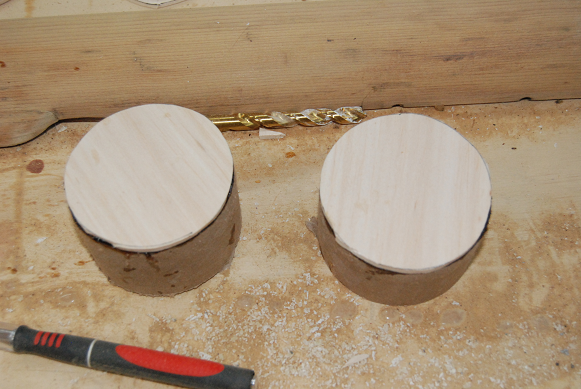 Yes, it is still all very rough, but filling, sanding, and polishing will take care of that. Unfortunately I have a busy work week ahead of me, so it may be a few days till I can get to them again. All the more time for the epoxy to harden up properly
As I have an English boat that will be towed by an English Truck, I decided to go all in and make the trailer look the part. Aside from dealing with it's structural issues. I will be changing out the fenders and lighting to look more vintage and, you guessed it, more English. The Fenders are glassfibre replicas of the Lotus 7's "cycle" fenders. These will allow me to fit a larger wheel and rim under them. The Axle-less suspension I am swapping in will allow 4 on 4 hubs which means I can run wheels from the MG Midget. For lighting, I am using reproduction lights from the MGA, with LED upgrades, to make sure the trailer looks as old as it is. For your pleasure, the mockups so far. I have to build some plinths to make the lights fit right, and the fenders are going to be set up to be easily removable before dunking so as not to ruin all my hard work, but you get the idea, blue painter's tape or not
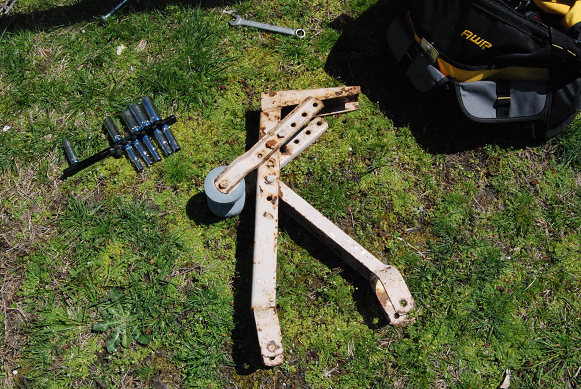
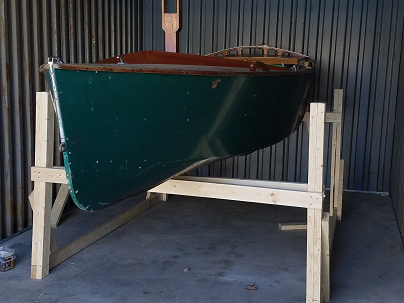
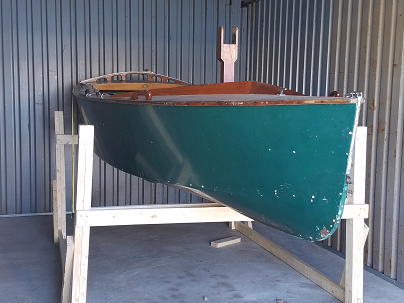
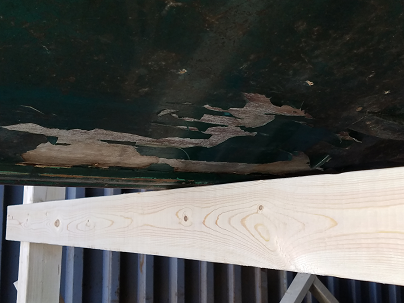
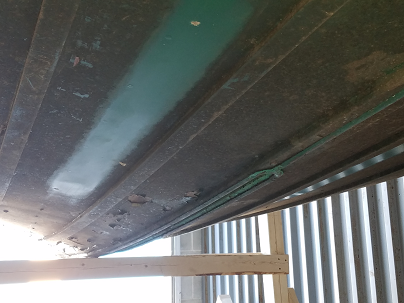
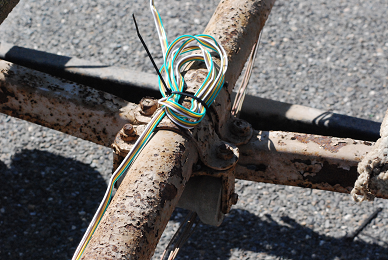
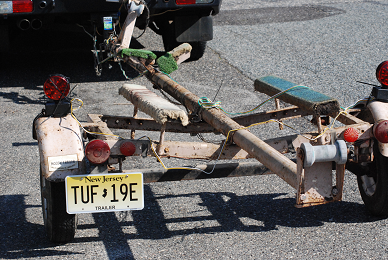
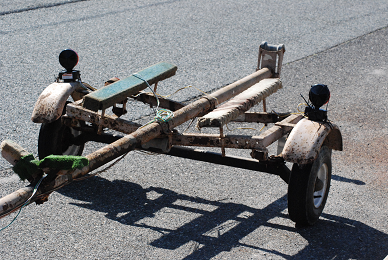
Before I can rebuild the Trailer, I have to strip it down. It just makes logical sense. In doing so, I have made two observations. One: It's not in all that bad of shape. It may look less than pleasing, stuff is loose, the lights didn't work, and the winch was frozen, but the basic bones of the trailer are in very good shape. Once all the rust is removed and the metal repainted, it will look good as new. Two: I am not dealing with "standard" non metric hardware. All of my cars and my Land Rover have been from Europe, I have a very large collection of metric tools, I am not about to buy standard tools to carry along also just to do either maintenance or emergency repairs. My tool bag is almost too heavy to lug around as it is, I do not want to add to it. Thankfully all bolts are thru bolts with nuts, so this is not too bad a job. I may even go Stainless. (yes, I know it galls) I needed to get spark off of her trailer for two reasons. One is to scrape and repaint her bottom. As you can see the years have not been kind to her paint and it is literally peeling off on it's own. The second reason is to rebuild and upgrade the trailer. This will require a lot of scraping, wire brushing, sanding, and paint. If I am honest, it is not in bad shape for being 6 years older than I am, but I certainly hope I will look better than it when I am it's age. All done with 2x4s cut to fit and screwed together to form a very sturdy structure for her to sit on. As the trailer slipped forwards as I was trying to jack up the bow, I had to pick it up and wiggle her back, so I know the structure is quite sound. The trailer is not so sound. Best described as "Rust with white", I have a couple days of work ahead of me to get it all ship shape and Bristol fashion.
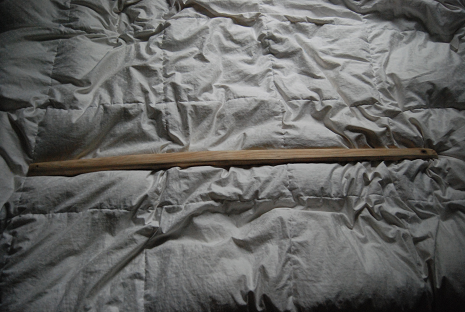
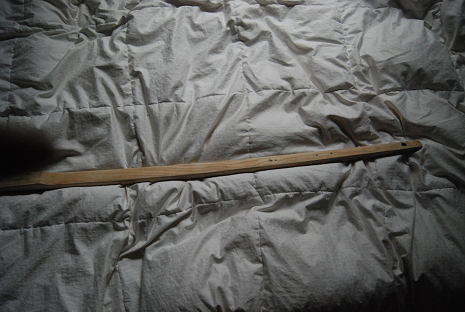
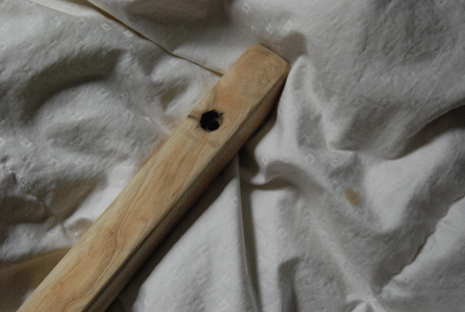
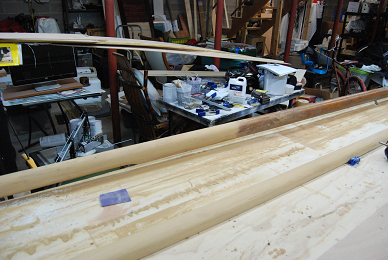
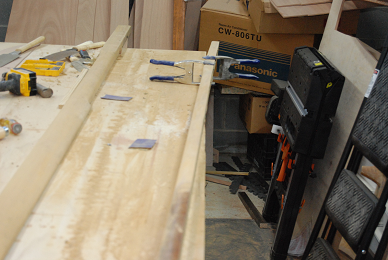
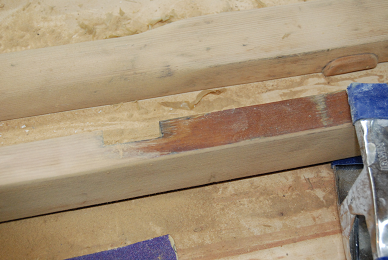
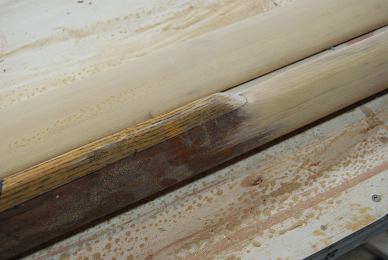
I definitely need one of those front and rear facing dash cams. in the short 5 mile trip home I had two near incidents. One from a guy in a VW golf who did not even notice the trailer until it was almost too late. He almost centre punched his grill on the end roller. The other was a pickup truck that went around me as I turned left off of the road. I guess he forgot that trailers swing wide, he almost lost his door to the end roller too. With Spring seemingly here finally, the urge to go sailing grows great. With Spark finally legal, it's time to make her safe and shipshape. I am not going to get her in Bristol fashion this year, I still want to take her down to St. Michaels this fall in more or less "as is" condition just to show her off as the Barn Find she is. This does not mean that I will not be sprucing up a few bits as I do repairs. With the Mast still in two parts, I am now sanding the other half to get all the old varnish off. Then it will be regluing the two halves together before I can sand everything much smoother before re-varnishing. I just wish I could get the people at the foundry to return my emails about new Mast Sheaves. These are only part way done, I wanted to show off the difference in how dark the old 50+ year old varnish is compared to how the wood looks beneath it. Quite a difference, non?
|